
Our intelligence tools are designed to handle hundreds of recipients simultaneously. Whether you are sending a digital market report or a physical postcard, the recipient management workflow ensures data integrity and high delivery rates.
Phase 1: Preparing Your Data
Before uploading, you must ensure your contact list is formatted as a CSV (Comma Separated Values) file. If you are using Notepad to build your list, follow these exact formatting rules.
Format in Notepad
The first line of your file must contain the Headers (Name, Email, etc.). Every subsequent line should contain one contact, with each piece of information separated by a comma.

Raw contact data formatted with comma separators in Windows Notepad.
Saving as CSV
Click File > Save As. In the dialog box, ensure you change the "Save as type" to "All Files" and manually type .csv at the end of your filename.
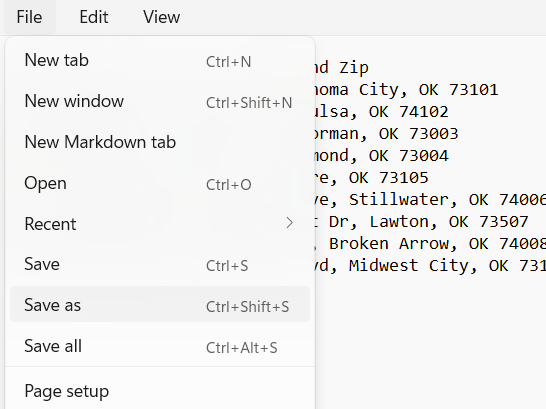
Selecting "Save As" from the file menu.
Type ".csv" manually at the end of your file name.
Phase 2: The Upload Workflow
Upload Your CSV Data
Begin by preparing your CSV file. The system expects headers like Name, Address, City, State, and Zip. Simply click the "Upload CSV" button or drag your file into the designated drop zone.

The CSV upload interface within the primary builder panel.
Managing Populated Contacts
Once uploaded, the system instantly parses the data and populates the Recipient Management area. Here, you can see a high-level overview of every contact loaded into the current session.
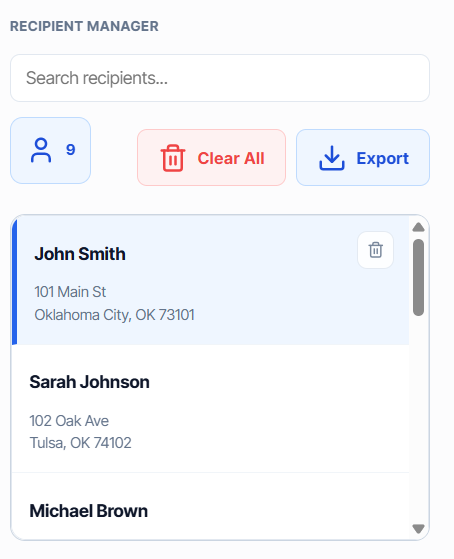
Reviewing the parsed recipient data before finalizing the campaign.
Finalizing the Campaign Basket
The Campaign Basket is your final gatekeeper. It shows exactly which recipients are "locked in" for the mailing. This area allows you to perform individual deletions to remove duplicates or non-compliant addresses before the final send.

The Campaign Basket view showing recipients ready for dispatch.
Pro-Tip: Individual Deletion
If you notice an error in a single address, use the red "Trash" icon in the Campaign Basket. This removes that specific recipient without requiring you to re-upload the entire CSV list.
Why we use this workflow
By splitting the process into Upload → Review → Basket, we prevent costly mailing errors. This three-stage verification process ensures that every dollar spent on postage or email credits is directed at a verified, high-value lead.